Embroider On Socks
by Michelle of Abigail Michelle Embroidery
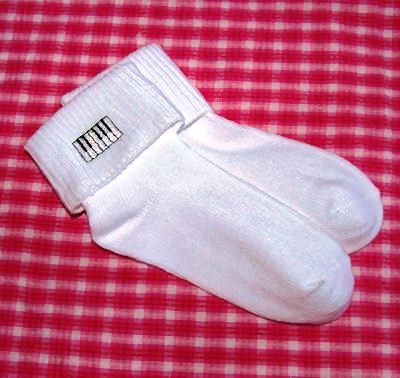
There are so many possibilities when it comes to embroidery and this is one of my favorites. Just about any outfit I make or purchase can be extra special by embroidering on socks!
Here, I will show you how easy it is. Just looking through mini designs is enough to get my creativity pumping and even inspire me to create a whole new outfit for my daughter just based on these tiny designs.
There are smaller hoops available just for this purpose, however I will show you how easy it is to make on the regular 4x4 flat hoop.
Here is what to do:
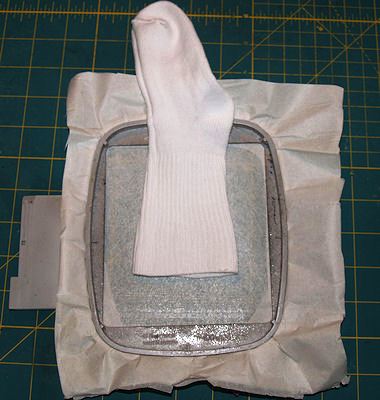
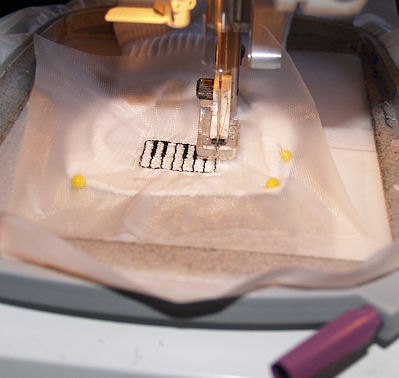
1) Hoop sticky stabilizer. A tear-away stabilizer sprayed with adhesive spray also works great. Place sock flat on your hoop as shown.
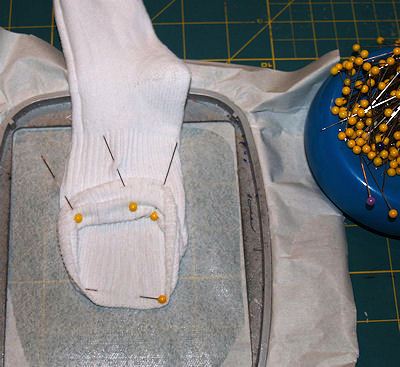
2) Gently add a pin to the edge of the cuff , (the bottom of the sock as you are looking at it). Be sure to catch the sock as well as the stabilizer with the pin. This helps to keep it attached to the hoop and stabilizer.
Socks can be thick and want to move around in the hoop. The pins help keep it steady. Once your first pin is in place, place three other pins around the top layer of the sock, as seen in the photo. All pins need to catch the sock as well as the stabilizer.
Be extra careful not to let the machine stitch over a pin.
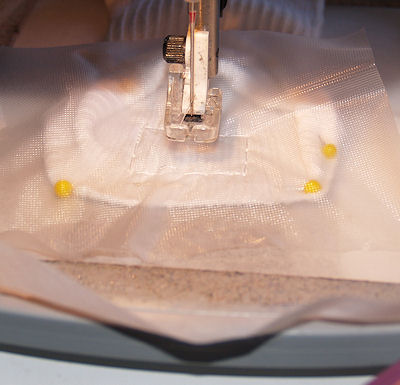
3) Bring the hoop to your embroidery machine and lock into place. Since socks are usually thick and bulky, using a water-soluble stabilizer on top before embroidering is a good idea. It will also help keep the stitches from sinking into the knit sock.
If your machine has a built in basting stitch, now is a great time to use it. If not, you can simply "float" the piece on top of the sock area until it starts stitching. Once the design gets going, it will automatically hold it into place. Only a small scrap of water soluble stabilizer is needed for the mini sock designs.
4) Begin stitching your design as normal. Smaller designs generally take less time to stitch out, but make such a big impact on a project.
5) Once the design is done stitching, remove the hoop from the embroidery machine and place on your work table. Remove any basting stitches that may be holding the water soluble stabilizer down.
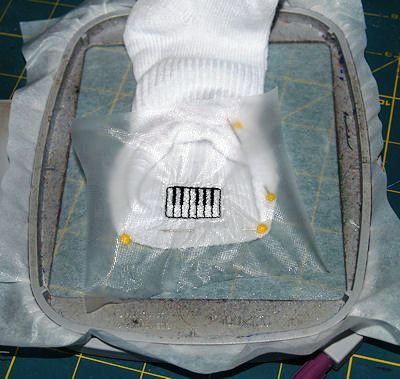
6) Remove the water soluble stabilizer and gently remove the pins and sock from the hoop.
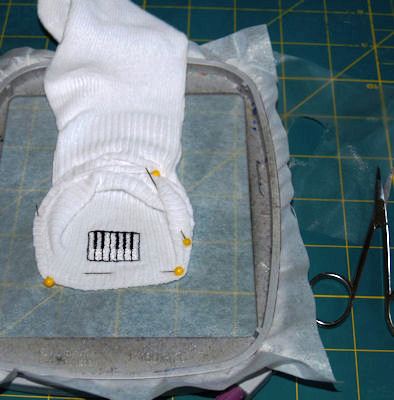
7) Don't forget to make a matching pair. Enjoy!

_______________________________________
Do you love the mini piano keys design used in this tutorial?
It's yours for FREE! Thank you, Michelle, for your generosity!
You can find this design and many more mini designs here:http://www.swakembroidery.com/mini-designs.htm
Find all of Abigail Michelle's embroidery designs here: